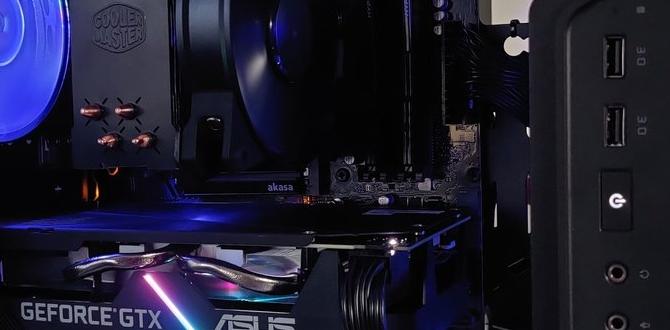
In the world of gaming PCs, enthusiasts are constantly seeking ways to build powerful rigs that can handle the latest games with ease. For those looking to create a compact yet potent gaming setup, a ROG Micro ATX system is an excellent choice. In this guide, I will walk you through the process of selecting compatible ROG Micro ATX components, assembling them, and ensuring optimal performance for your gaming needs.
Choose Compatible ROG Micro ATX Components
Select ROG Micro ATX Motherboard
When building a gaming PC, the motherboard is a crucial component that acts as the foundation for the entire system. For a ROG Micro ATX build, it is essential to choose a motherboard that is not only compatible with the Micro ATX form factor but also offers the necessary features for gaming performance. Look for a ROG motherboard that supports your desired processor and GPU, has ample connectivity options, and features robust power delivery for stable performance.
Ensure Compatibility with Processor and GPU
Before purchasing components for your ROG Micro ATX build, ensure that the processor and GPU you select are compatible with the motherboard you have chosen. Check for socket compatibility between the processor and motherboard, as well as clearance for the GPU within the Micro ATX case. This step is crucial to avoid any potential compatibility issues that could hinder system performance.
Assemble the Components
Install CPU and Cooler
Begin the assembly process by installing the CPU into the motherboard’s socket, following the manufacturer’s instructions carefully. Apply thermal paste to the CPU, then attach the cooler to ensure proper cooling during gaming sessions. Make sure the cooler is securely mounted to prevent overheating.
Insert RAM and Storage Devices
Next, insert the RAM modules into the motherboard’s memory slots, ensuring they are seated correctly and secured with the retention clips. Install your storage devices, such as SSDs or HDDs, in the designated drive bays and connect the necessary cables for data transfer.
Install GPU and Connect Power Supply
Install your GPU into the PCIe slot on the motherboard, securing it with the retention mechanism. Connect the power supply cables to the GPU for adequate power delivery, ensuring a stable performance during demanding gaming sessions. Organize the cables for optimal airflow within the case to maintain efficient cooling.
Cable Management and Testing
Organize Cables for Optimal Airflow
Proper cable management is essential for maintaining optimal airflow within your ROG Micro ATX build. Route cables neatly, using cable ties or clips to secure them in place and prevent clutter. This improves airflow within the case, reducing the risk of overheating and enhancing overall system performance.
Power On and Test System Functionality
After completing the assembly process, power on your ROG Micro ATX gaming PC and test its functionality. Ensure that all components are recognized in the BIOS, and run stress tests to confirm stability under load. Make any necessary adjustments to optimize performance and enjoy a seamless gaming experience on your custom-built system.
Conclusion
Building a ROG Micro ATX gaming PC is a rewarding experience that allows you to tailor your system to meet your gaming needs. By carefully selecting compatible components, assembling them with care, and optimizing cable management, you can create a powerful gaming rig that delivers exceptional performance. Follow the steps outlined in this guide to build your own ROG Micro ATX gaming PC and elevate your gaming experience to new heights.
FAQs
1. Can I use a ROG Micro ATX motherboard with any processor?
It is essential to ensure that the processor you choose is compatible with the socket on the ROG Micro ATX motherboard to avoid compatibility issues.
2. How important is cable management in a ROG Micro ATX build?
Proper cable management is crucial for maintaining optimal airflow within the case, which helps prevent overheating and improves overall system performance.
3. What are some key features to look for in a ROG Micro ATX motherboard for gaming?
When selecting a ROG Micro ATX motherboard for gaming, look for features such as robust power delivery, ample connectivity options, and support for high-performance processors and GPUs.
4. How can I test the functionality of my ROG Micro ATX gaming PC?
You can test the functionality of your system by powering it on, entering the BIOS to ensure all components are recognized, and running stress tests to check stability under load.
5. Why is thermal paste important when installing the CPU in a ROG Micro ATX build?
Thermal paste is essential for ensuring proper heat transfer between the CPU and the cooler, helping to dissipate heat effectively and prevent overheating during operation.
