When it comes to building a high-performance gaming PC, selecting the right components is crucial. One key component that can greatly enhance your system’s performance is a CPU liquid cooler. In this guide, I will take you through the steps of building a gaming PC with a CPU liquid cooler, from choosing the right components to completing the build.
Choose the Right Components
Select compatible CPU liquid cooler
Before starting your PC build, make sure to choose a CPU liquid cooler that is compatible with your processor socket. Research and select a liquid cooler that fits your case and provides adequate cooling for your CPU.
Prepare the Case
Measure space for liquid cooler
Prior to installation, measure the space in your case to ensure that the CPU liquid cooler will fit properly. Make sure there is enough clearance for the radiator and fans to avoid any compatibility issues.
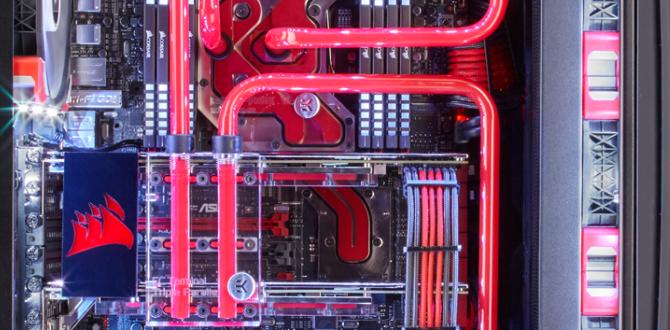
Install the CPU Liquid Cooler
Attach the backplate securely
Begin by attaching the backplate of the CPU liquid cooler to the motherboard. Ensure that it is securely fastened to provide proper support for the cooler. Follow the manufacturer’s instructions for the specific installation steps.
Connect the Cooler to the Motherboard
Securely plug in power and fan cables
Next, connect the CPU liquid cooler to the motherboard. Plug in the power cable and fan cables to the corresponding headers on the motherboard. Make sure the connections are secure to prevent any issues during operation.
Run a Test
Check for leaks and monitor temperature
After installing the CPU liquid cooler, it is important to run a test to check for any leaks. Turn on your PC and monitor the temperature to ensure that the cooler is functioning properly. Any signs of leakage should be addressed immediately.
Complete the Build
Secure all components and cables
Once you have verified that the CPU liquid cooler is working correctly, complete the build by securing all components and cables in your PC case. Ensure that everything is properly organized and secured to prevent any damage or interference with cooling.
Conclusion
Building a gaming PC with a CPU liquid cooler can greatly enhance performance and cooling efficiency. By following the steps outlined in this guide, you can ensure a smooth and successful PC build with optimal cooling for your components.
FAQs
1. Do I need a CPU liquid cooler for gaming?
While not mandatory, a CPU liquid cooler can provide better cooling performance compared to air coolers, especially during intensive gaming sessions.
2. How do I know if a CPU liquid cooler is compatible with my motherboard?
Check the compatibility of the CPU liquid cooler with your motherboard socket type. Most manufacturers provide a list of compatible sockets for their coolers.
3. Is it difficult to install a CPU liquid cooler?
Installing a CPU liquid cooler can be a bit challenging for beginners, but following the manufacturer’s instructions carefully can make the process easier.
4. Can I overclock my CPU with a liquid cooler?
Yes, a CPU liquid cooler can help keep the temperature of your CPU lower, allowing for better overclocking performance, but make sure to do it within safe limits.
5. How often should I maintain my CPU liquid cooler?
It is recommended to clean and maintain your CPU liquid cooler every 6-12 months to ensure optimal performance and longevity.